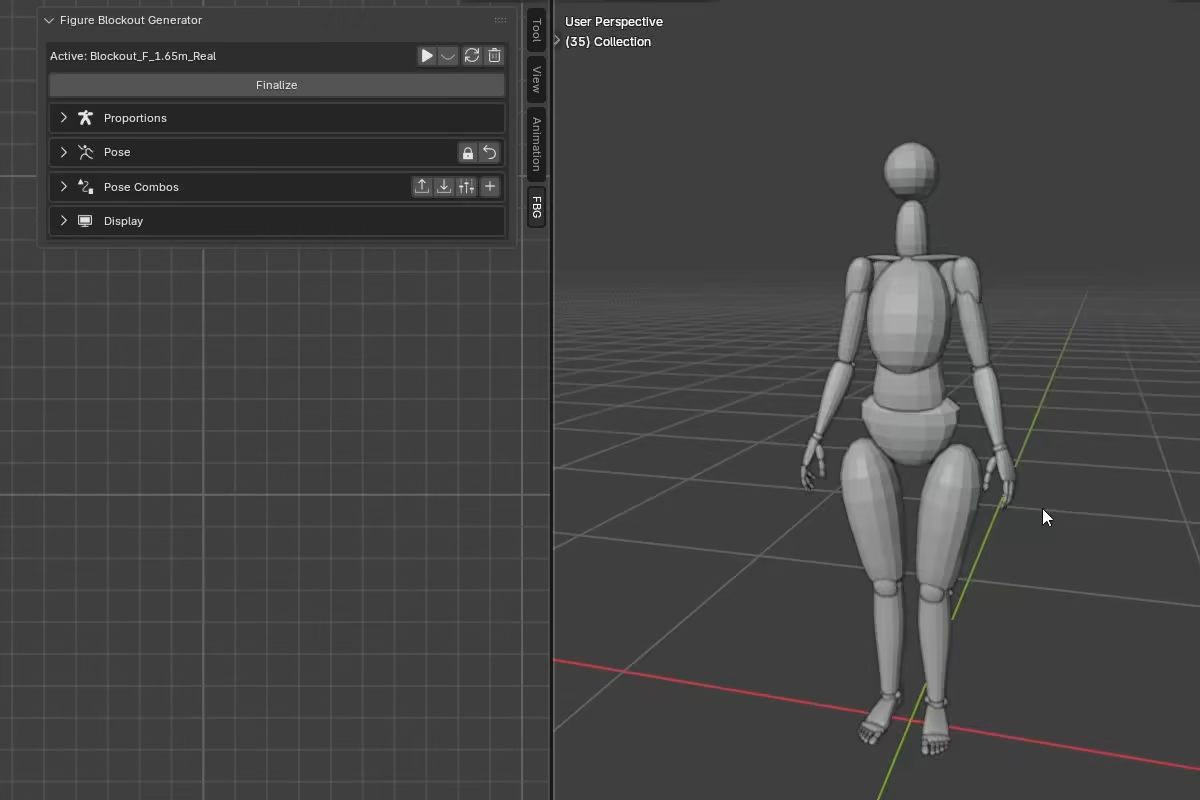
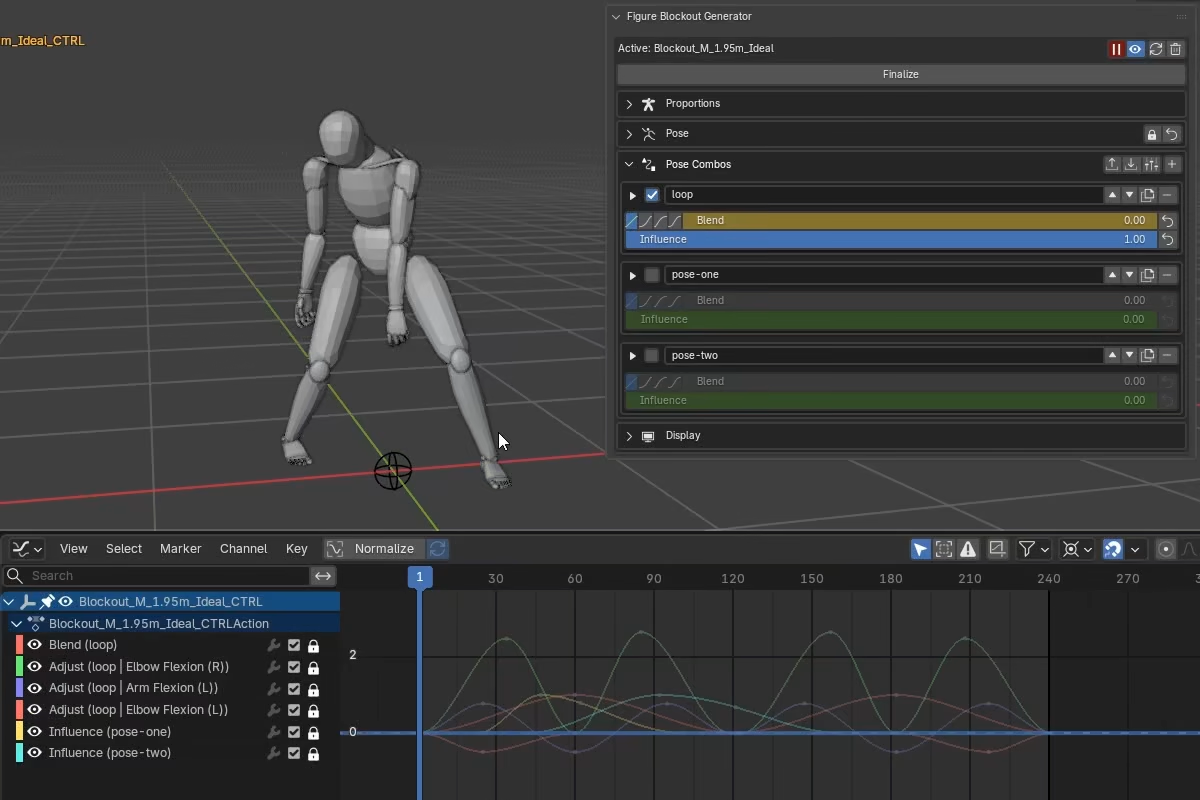
Pose Combos
A Pose Combo is a custom pose layer that drives multiple pose properties through a single Blend control. You define which properties the combo drives and what values they hold at the start and end of its motion (and optionally a midpoint), and from there one slider shapes the whole pose.
Combos are designed with animation in mind. Blend is an interpolation control by construction, and additional options that let you refine how the interpolation plays out. Combos evaluate top to bottom, so you can stack them to build more complex motions.
Combos can be saved into a preset, and reused across different .blend files. A combo preset can also serve as the rest pose source for Bake to Rig.

What a combo contains
A combo is a small set of controls and authored values that together define one pose layer. Each combo holds:
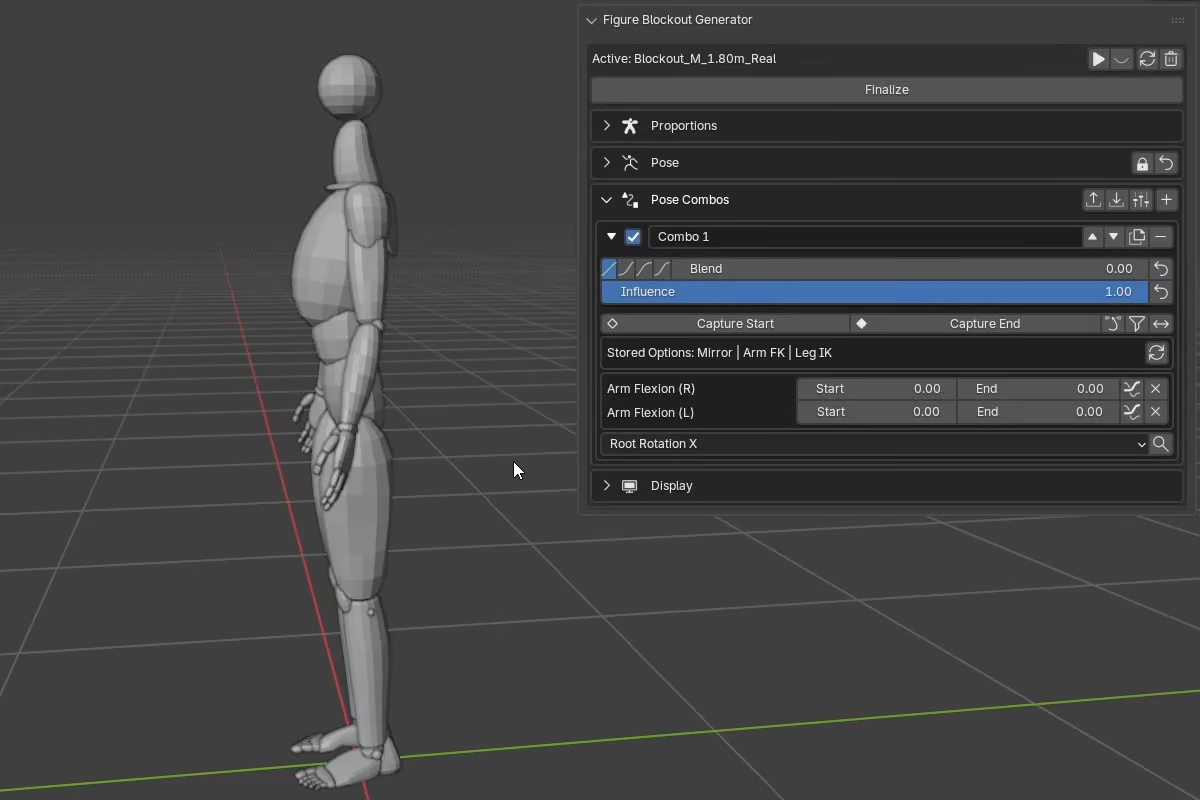
- A property list -- the pose properties the combo drives. Each property row stores
Start,End, and (optionally)Midvalues, plus per-propertyOffsetandAdjustrefinements. - Core controls --
Enabled,Blend,Influence, andEasing. These shape how the combo contributes to the final pose. - Midpoint toggle -- enables the
Midcolumn on every property and switches the interpolation to a three-stage curve. - Stored Options -- a snapshot of pose mode flags that were active when the combo was captured (Pose Mirror, Arm Inherit Torso, FK/IK, Limits Bypass).
The rest of this page walks through each of these.
Building a combo
The easiest way to understand Pose Combos is to make one and move its Blend slider.
- Click the
+button in the Pose Combos header to create a new combo. - Populate it in one of two ways:
- Capture: pose the figure, then use
Capture Start,Capture End, orCapture Midto fill the combo from the current pose. - Manual: add properties with the dropdown or search button, then enter their
Start,End, and optionalMidvalues yourself.
- Capture: pose the figure, then use
- Drag
Blendfrom 0 to 1 to interpolate between the stored values.
When you add a bilateral property manually, FBG also tries to add its left or right counterpart automatically.
That is the basic combo workflow: define which properties the combo controls, define what values they should have across its range, then interpolate through Blend.
Core controls
Enabled
Toggles whether the combo participates in evaluation.
When enabled, the combo claims its properties. Those properties are controlled by the combo system every time the stack evaluates. Adjusting a claimed property directly in the Pose section will still work visually, but the next evaluation will overwrite it.
When disabled, the combo is muted. It no longer overwrites its properties on evaluation, so direct edits and other combos' results on those properties will stick.
Influence = 0 is not the same as disabled
A combo at Influence = 0 still claims its properties -- it just contributes nothing to their values. Those properties will sit at their rest-pose defaults (or at whatever earlier combos resolved). To fully release properties back to direct keyframe control, disable the combo.
Each combo carries a snapshot of mode flags -- Stored Options like Pose Mirror, FK/IK, Limits Bypass. Those flags are restored when a combo's Enabled channel goes from off to on.
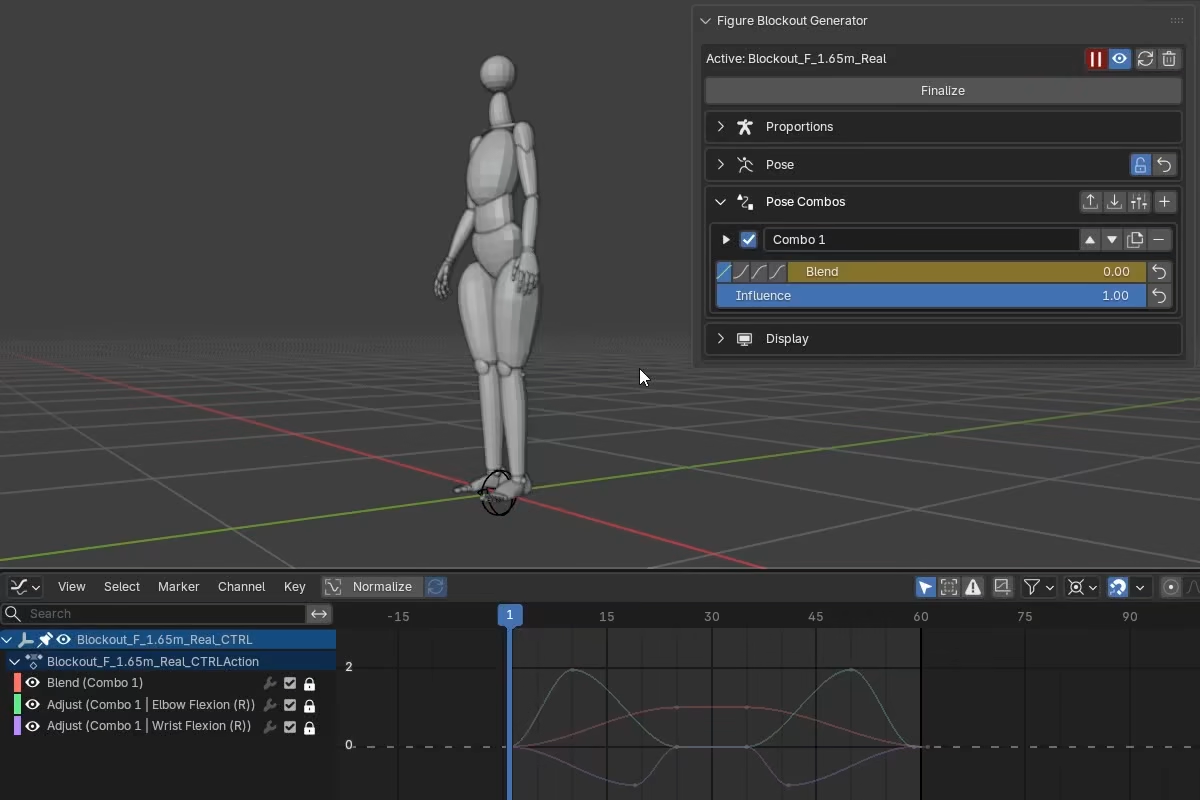
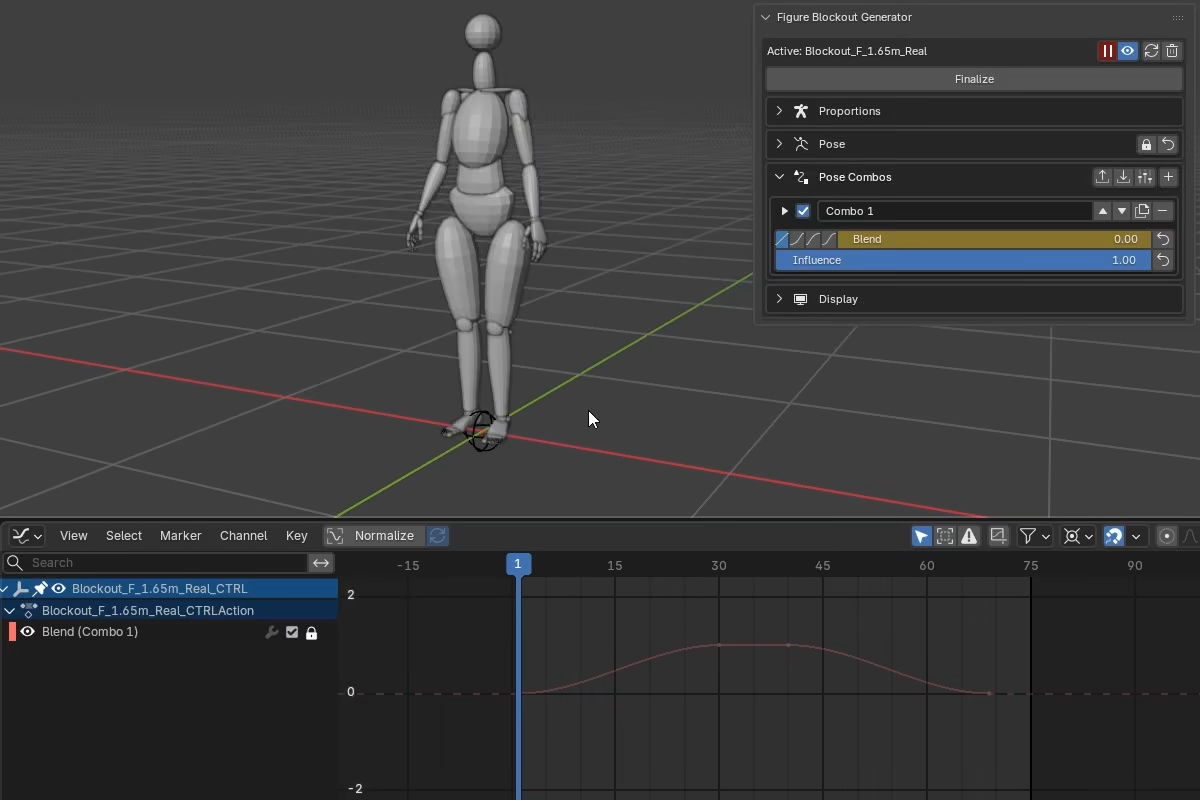
Blend
Controls what pose the combo produces internally.
Blend = 0-- all properties are at theirStartvaluesBlend = 1-- all properties are at theirEndvaluesBlend = 0.5-- halfway between Start and End (or atMidvalues, if Midpoint is enabled)
Blend answers: what pose does this combo want?
Start, End or Mid values are set per property. Blend drives the interpolation across all of them at once.
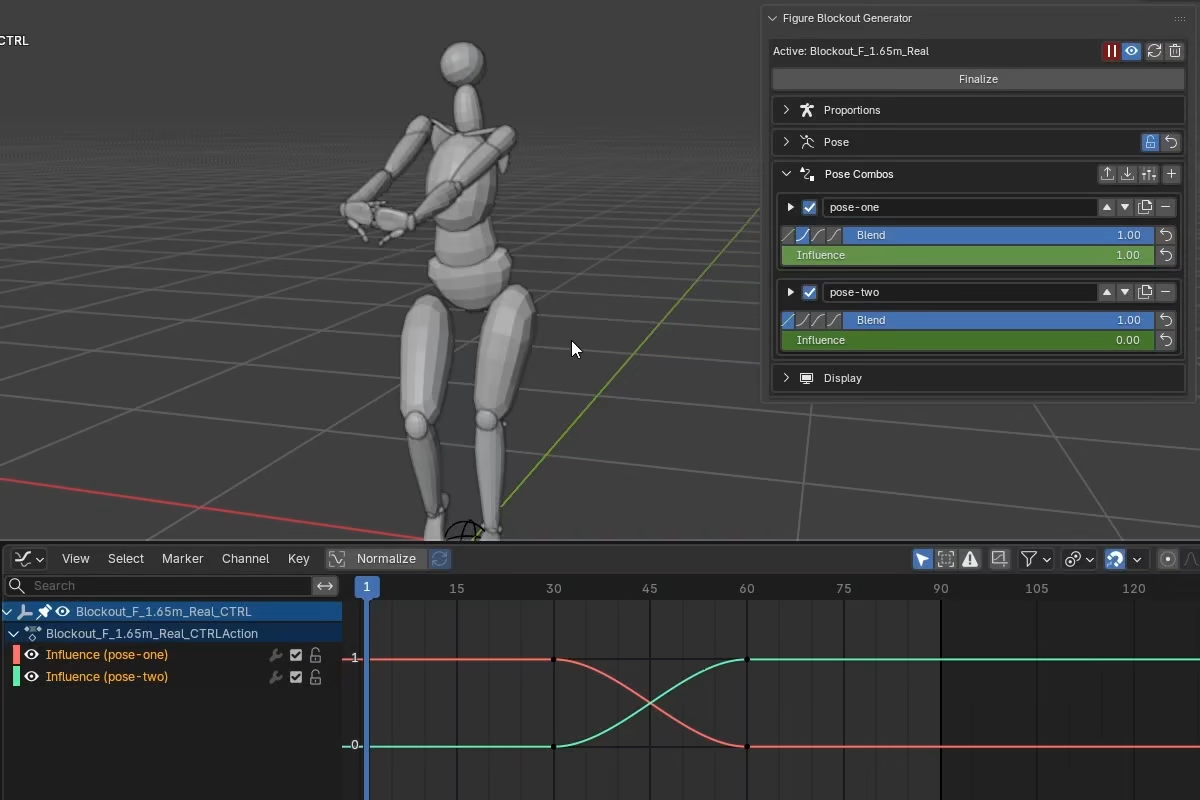
Influence
Controls how much of this combo's result reaches the final pose.
Influence = 1-- the combo fully applies, overriding whatever the stack resolved before itInfluence = 0.5-- the result is blended halfway between the previous stack value and this combo's outputInfluence = 0-- the combo contributes nothing (but still claims its properties)
Influence answers: how much does this combo contribute?
The math is one linear interpolation per property:
previous_value is the accumulated result of all earlier combos in the stack, so Influence effectively weights this combo against everything above it.
Example: Two combos both drive Arm Abduction. Combo A is above Combo B in the stack, both at Blend = 1.
- Combo A: End = 90, Influence = 1 -- resolves to 90
- Combo B: End = 45, Influence = 1 -- fully overrides A. Final result: 45
- Combo B: End = 45, Influence = 0.5 -- blends halfway between A's result (90) and B's value (45). Final result: 67.5
Easing
Changes the response curve of the Blend slider. Four modes are available:
- Linear -- constant speed from Start to End
- Ease In -- starts slow, accelerates toward End
- Ease Out -- starts fast, decelerates toward End
- Ease In-Out -- slow at both ends, faster in the middle
Easing only affects Blend. It does not affect Influence.
Midpoint
When Midpoint is enabled, each property gets a third value -- Mid -- in addition to Start and End.
Blend = 0-- StartBlend = 0.5-- MidBlend = 1-- End
The interpolation uses two joined cubic Hermite segments -- one from Start to Mid, one from Mid to End -- with smooth continuity at the midpoint, so the curve passes through Mid with no hard velocity break. This lets you define a three-stage motion through a single slider.
When Midpoint is first enabled, all Mid values initialize to the average of each property's Start and End. Capture Mid is available when Midpoint is on.
Per-property refinement
Each property row has a graph icon toggle that reveals two additional controls: Offset and Adjust. These allow independent per-property timing and value corrections without leaving the combo system.
Offset
Shifts when a property's motion happens within the Blend range. The full Start-to-End value range is always preserved -- it is compressed into a shifted window of the Blend range.
Offset = 0-- normal behavior, property follows Blend directlyOffset < 0(lag) -- the property starts moving later. AtOffset = -0.2, the property holds at Start while Blend goes from 0 to 0.2, then completes its full motion between Blend 0.2 and 1.0.Offset > 0(lead) -- the property finishes early. AtOffset = 0.2, the property completes its full motion by Blend 0.8, then holds at End.
Use Offset to stagger body parts within a single combo -- for example, the arm leads while the pelvis lags, all driven by one Blend slider.
Adjust
Adjust shifts a property's value by a fixed amount after the combo has evaluated it -- it is a constant correction that does not change with Blend.
In code terms:
Offset controls when a property moves within a combo. Adjust corrects the value after that motion has been evaluated.
Adjust is not an absolute value in degrees or meters. It is a fraction of the property's motion span inside the combo: abs(End - Start) without Midpoint, or the full lowest-to-highest range across Start, Mid, and End with Midpoint.
Adjust = 0-- no effect, the property uses its normal interpolated valueAdjust = 0.1-- adds 10% of the motion range at every Blend positionAdjust = -0.05-- subtracts 5% of the motion range at every Blend position
The Midpoint span only differs from abs(End - Start) when Mid goes beyond either endpoint, making the actual range larger than the direct Start-to-End distance.
Adjust always works in value space, not further along the arc. In other words: positive Adjust always pushes the value higher, and negative always pushes it lower.
Example: a property with Start = 0 and End = 90 has a motion span of 90. With Adjust = 0.1 the correction is always +9, so:
Blend= 0.0: interpolated = 0, correction = +9, result = 9Blend= 0.5: interpolated = 45, correction = +9, result = 54Blend= 1.0: interpolated = 90, correction = +9, result = 99
Adjust in animation
Adjust is often the easiest combo-property channel to animate when one property needs extra polish. The correction is constant regardless of the Blend position. This makes Adjust ideal for keyframing over time.
It gives that property one dedicated f-curve inside the combo, so you can shape extra push, overshoot, or settle without changing the property authored values.
Because Adjust is normalized, its f-curve stays in a similar scale to Blend, Influence, and Offset -- making the graph editor easier to work with.
A common workflow is to block out motion with Blend, then selectively refine individual properties by keyframing their Adjust values.
Capture tools
The capture tools populate a combo's property values from the current figure pose. Each capture also snapshots the current mode flags into Stored Options automatically.
Capture Start, End, and Mid
Each capture tool saves the current pose into the corresponding column -- Start, End, or Mid -- and sets Blend to match (0, 1, or 0.5), since the figure is already at that pose.
Capture auto-adds properties to the combo based on two conditions:
- The property differs from its rest-pose default, or
- The property is already claimed by another enabled combo (even if the current value equals the default -- this allows capturing an explicit return-to-default override on top of another combo)
Capture also respects the current pose mode:
- Mode-aware for FK/IK. Only properties from the currently active FK/IK mode are captured. This prevents stale values from the mode you are not authoring in from being swept into the combo.
- Mirror-aware. With Pose Mirror off, capture reads left and right from their own property values. With Pose Mirror on, left-side capture reads from the right-side properties instead, matching the mirrored pose on the figure rather than the unused left-side property slots.
Capture Mid is only available when Midpoint is enabled.
Pose Mirror still applies to combo evaluation
Bilateral combo rows do not bypass Pose Mirror. With Mirror on, the resolved right-side bilateral values drive both sides of the figure during evaluation, even if the combo stores separate left and right property rows.
Capture Exclusive
A filter toggle on the capture row. When enabled, capture skips any property that is already present in another enabled combo.
This is useful when layering a new combo on top of an existing setup. With Exclusive on, only the properties not already owned elsewhere are captured.
Stored Options
Each combo stores a snapshot of pose mode flags from the context it was authored in. These flags are saved with the combo so it can restore that same pose context later.
What gets stored:
- Pose Mirror
- Arm Inherit Torso (R and L)
- Arm FK/IK mode (R and L)
- Leg FK/IK mode (R and L)
- Limits Bypass
Auto Stance Height is intentionally not stored here. It is a figure-wide support-context toggle, so combos do not switch it when their Enabled channel turns on.
The Stored Options row in the expanded combo shows which flags are active in the snapshot. The recapture button updates the snapshot from the current settings without changing any property values.
When Stored Options are applied
- Stored Options are applied when a combo's
Enabledchannel transitions from off to on - Turning a combo off does not revert the flags it applied.
- If two combos with conflicting Stored Options turn on the same frame, the later one in the stack wins.
Mirror-aware Stored Options
With Pose Mirror on, stored left-side mode flags are captured from the right side. This keeps the Stored Options snapshot aligned with the mirrored pose context the combo was authored in.
Limits Bypass only elevates, never restricts
Stored Limits Bypass is asymmetric on purpose. If a combo's snapshot has Limits Bypass on, enabling the combo will turn bypass on. But if the snapshot has it off, enabling the combo will not force bypass off -- a combo can extend freedom, but it cannot take it away. This prevents one combo from silently clamping values that another combo in the stack is relying on.
Combo stack evaluation
When multiple enabled combos affect the figure, FBG resolves them as a stack to produce the final pose. This same rule is used during editing and during animation playback.
- Collect all properties referenced by enabled combos. These properties are now combo-driven for this evaluation.
- Reset only those combo-driven properties to their rest-pose defaults (this ensures results are deterministic regardless of previous state). Properties not controlled by any enabled combo are left unchanged.
- Walk through enabled combos in list order (top to bottom). For each combo:
- Apply easing to the combo's
Blendvalue. - For each property: apply
Offsetremapping to the Blend position, interpolate betweenStartandEndor betweenStart,Mid, andEnd, then add theAdjustcorrection. - Blend that property's result into the running value using
Influence.
- Apply easing to the combo's
- Clamp the final resolved values to pose limits, unless Limits Bypass is active.
- Write the resolved values back to the figure.
Order matters. A later combo with Influence = 1 fully overrides shared properties from earlier combos. With Influence between 0 and 1, it blends with the value resolved so far. With Influence = 0, the combo contributes no value, but its properties are still claimed because the combo is enabled.
Layering patterns
Multiple combos can drive the same properties at the same time, producing blended or layered results.
One combo can carry the base motion while other combos fade in and out on top of it through Influence, adding temporary pose accents without replacing the underlying animation.
Animate one combo's Influence from 0 to 1 while the other's goes from 1 to 0. The figure blends from one pose to the other over those frames.
One combo can hold a target pose while another combo above it animates into and out of that pose. Blend drives the transition motion, and Influence fades that combo away to reveal the held pose underneath.
These are only example layering patterns. Combos can also be used in other ways, such as stepped activation, partial overrides, or sequenced handoffs where different combos take over different parts of the motion over time.
Combo management
The combo list header provides Export, Import, and Presets buttons for saving and loading combo setups (see Presets below). Each combo row has buttons to move it, duplicate it, swap its motion, or delete it.
- Move up / down -- reorders the stack. Affects evaluation order when combos share properties.
- Duplicate -- creates a full clone of the combo.
- Swap Start/End -- reverses the combo's motion direction. Swaps all Start and End values, negates all Offset values, and inverts the current Blend position. The result is the same motion played in reverse.
- Delete -- removes the combo from the stack. If it was enabled, any properties that no remaining enabled combo drives are reset, while shared properties are taken over by the combos that remain.
Presets
A preset is a saved combo setup that can be loaded into any blockout. Besides the combo list itself, a preset also stores the global pose-mode flags and body proportions that were active when it was saved. This preserves the authoring context the combos were built in. Presets are also how combo setups travel between .blend files.
Beyond live posing, a combo preset can serve as the rest pose source for Bake to Rig -- instead of the rig inheriting the figure's default rest pose, you define the pose you want in a combo, save it as a preset, and select it at bake time. The generated rig uses that pose as its rest pose while keeping the animation and proportions from the active figure.
Saving and loading
There are two ways to save a preset:
- Presets popup -- a dropdown inside the Pose Combos section header. Saves to the Blender user config folder under
fbg_presets. Presets stored here are available from the popup across every.blendfile without managing external paths. - Export / Import JSON -- the separate Export and Import buttons save to any file path you choose.
Both methods use the same JSON data format. A preset saved through Export can be loaded through the popup if you drop it into the fbg_presets folder, and vice versa.
To save a preset:
- Create the combo list you want to keep.
- Open the
Presetspopup in the Pose Combos header and clickSave Current..., or useExportif you want an external JSON file. - Enter a preset name or choose a file path.
- Confirm overwrite if a preset with that name already exists.
A preset can contain one combo or many. Saving writes the current combo list as-is, in its current order and current state. If you want a preset to reproduce a specific pose, make sure the combo stack is already producing that pose when you save it.

What a preset contains
A preset stores the full combo context, not just the combo list:
- The combo list -- every combo slot with all its authored state: property list,
Start/Mid/Endvalues,Blend,Influence,Easing,Midpoint, per-propertyOffsetandAdjust, and Stored Options. - Mode flags at save time -- Pose Mirror, Arm Inherit Torso, FK/IK modes, Limits Bypass, Auto Stance Height.
- Body proportions at save time -- height, gender, proportion type, Structure, Volume.
Preset-level mode flags are separate from the Stored Options saved inside each combo. Those per-combo options apply when that combo turns on. Preset mode flags belong to the preset as a whole and are restored only when the preset is loaded in Replace mode.
Proportions are included because combo poses are proportion-sensitive. A combo authored on a 1.65m figure does not produce the same visual result on a 1.85m figure -- the joint positions are in different places, and the same joint rotations land differently. Storing proportions lets the loader reproduce the exact visual result the preset was authored against.
Combo preset proportions and Bake to Rig
When a combo preset is used as the rest pose for Bake to Rig, the preset provides only the pose. The body proportions for the generated rig are taken from the active figure, not from the preset. This ensures the baked animation matches the figure you are animating with.
Replace vs Append on load
When you load a preset, you choose between two modes.
Replace is a full context restore. It clears the current combo list and pose state, then applies the preset from the ground up:
- The current combo list and any combo-scoped keyframes are cleared.
- Pose properties are reset to their defaults. This prevents the old pose state from stacking on top of the newly loaded combos.
- The preset's mode flags are applied.
- The preset's body proportions are applied. If they differ from the current figure, the blockout rebuilds.
- The preset's combos are imported.
Append is the lightweight path. It adds the preset's combos to the existing list without touching anything else:
- The current combo list is kept, and new combos are added at the end.
- The current pose state is preserved. No default reset.
- Mode flags and body proportions are not applied -- the current figure keeps its context.
Which mode to use
Use Replace when you want the preset to look exactly as it did at save time. The combo list, mode flags, and body proportions all come back together, and the default reset makes sure nothing stale carries over from the current blockout. Use Append when you want to bring in combo definitions without changing the current figure -- for example, layering a new combo setup on top of an existing pose.